|
The header section is where you put in the top or main information of the invoice. Follow the instructions below.
|
|
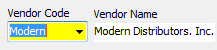
 Enter VendorEnter a Vendor by choosing a Vendor Code using the drop down arrow. This will also fill in the Vendor Name. If you do not have a Vendor set up and this Invoice is from a Vendor that may only be used 1 time you can just enter the Vendor name. If you are going to be entering Distributions using UPC codes you should set up the Vendor in Vendor Setup. |
 Invoice NumberEnter the Invoice number. Entry be numbers or letters.
|
 Invoice DateEnter the Date from the Invoice. You can use the drop down arrow to choose a date.
|
 Invoice CostEnter the Total Amount due on the Invoice. This is the amount you will match to with the Distributions.
|
 Due DateEnter or choose the Due Date from the invoice. If there is no Due Date just set it the same as the Invoice Date.
|
 Paid
via PayoutThis denotes whether the this Invoice is a Payout from Shift Paperwork. Payouts can only be created in Shift Paperwork> Payouts. |
 Discount
DateEnter or choose the Discount Date from the invoice. This entry is optional.
|
 Discount
AmountEnter the amount of the available Discount from the Invoice. This entry is optional.
|
 Work DateEnter or choose a work date. This date is important. If you are going to do UPC or Department Distributions, this date tells the My Pricebook what date the Items was put on the shelves for sale. The work date is only applicable if you are not doing Daily Activities/Shift Paperwork.
|
 ReferenceEnter a reference or description for this invoice. This is optional.
|