Add an Invoice
|
This screen is where all Invoices are entered or edited.
First lets give you a quick overview of the Invoice Screen.
Please read about each section and the go to the Invoice Header section to start adding an Invoice.
|

|
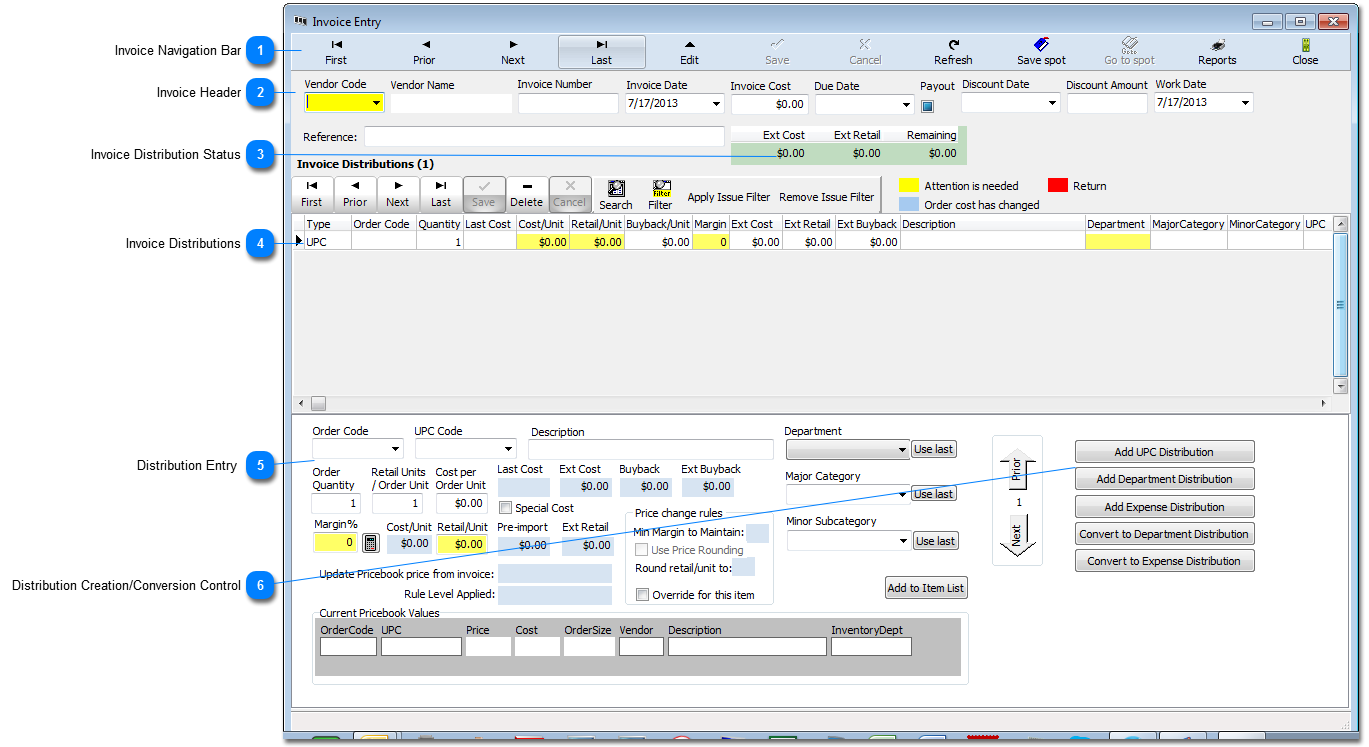
Invoice Navigation BarThis Navigation Bar let's you move between invoices without having to go back to the previous screen. You will not need to use this Nav Bar while you are adding an Invoice. Please see the Navigation Bar section for instructions on operation.
|


Distribution Entry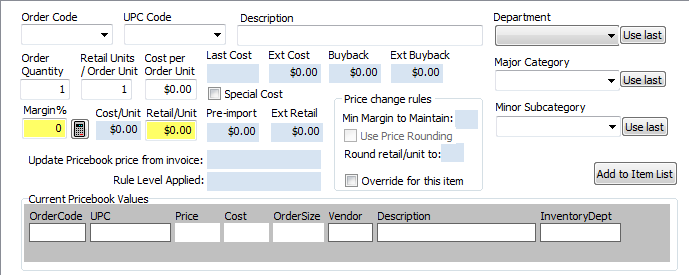 In this part of the screen you will enter all information for the Distribution you are working on. A detailed description of this screen is in the Add a Distribution how-to.
|
Distribution Creation/Conversion Control These buttons will be used to Add or Convert a Distribution. Go to the Invoice Header How-To to start your Invoice.
|